
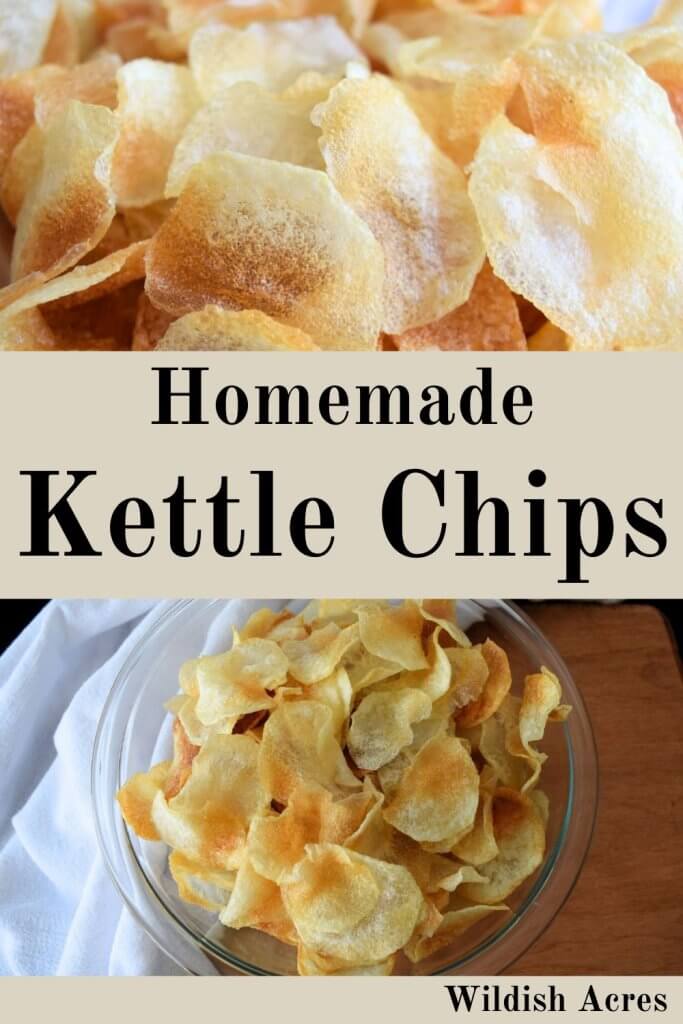
Nothing beats the crispy, salty, crunch of homemade kettle chips. This simple recipe is sure to satisfy your snacky cravings!
This post contains affiliate links, which means I make a small commission at no extra cost to you. See my full disclosure here.
What are kettle chips?
Kettle chips are similar to potato chips. They’re both thinly cut, crunchy potato slices. The difference is in how they are prepared. Homemade kettle chips are deep-fried in small batches, whereas commercial potato chips are fried in huge batches using a conveyor belt system.

How to make homemade kettle chips
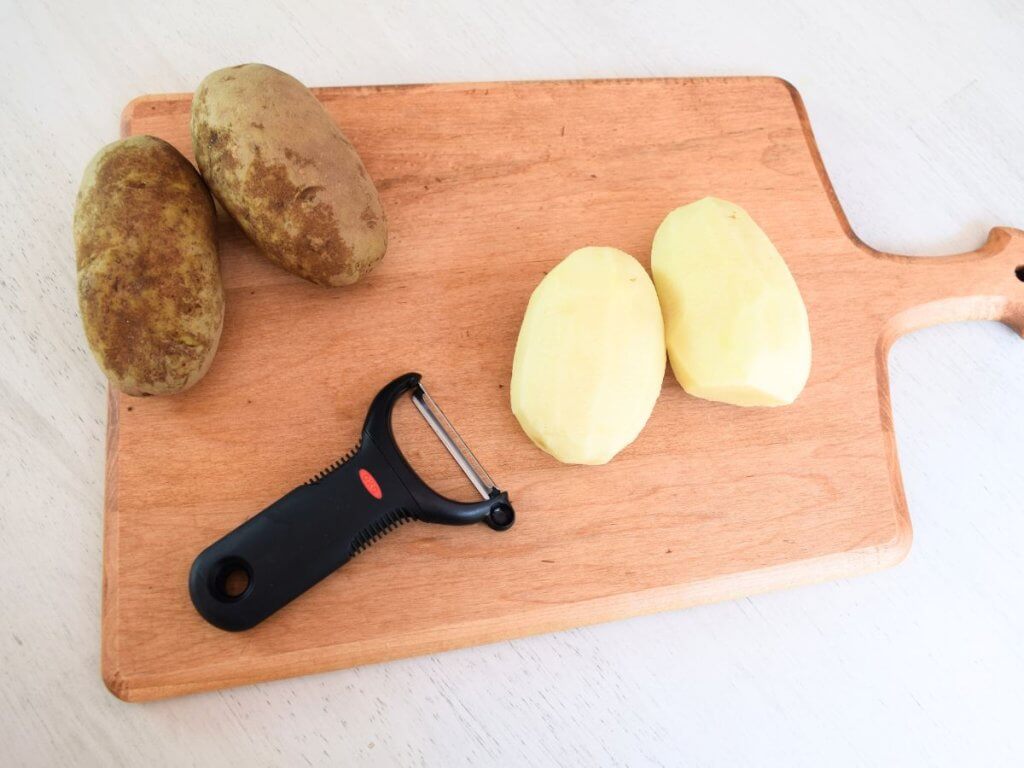
1. Peel
I start by peeling the potatoes with my potato peeler. However, this step is totally optional. If you don’t mind the skin, then feel free to leave it on!
2. Slice
Next, slice the potatoes as thinly as possible. I like to use my mandoline for super thin and uniformly sliced pieces. Uniform slices guarantee that each slice will cook at the same rate as the rest of the batch.

A mandoline makes quick work of the potatoes, but make sure you watch your fingers! The blade is wicked sharp and it’s so easy to cut yourself if you aren’t careful. Ask me how I know. If your mandoline comes with a guard, use it! If it doesn’t, you can use a cut-resistant kitchen glove.
It’s not absolutely necessary to use a mandoline, and you can definitely do this with a knife if you have a steady hand, it’ll just take longer.
3. Soak then dry
After slicing, place the chips in a bowl of cold water. Leave them to soak for about 30 minutes. This will draw out the starch and make for a crispier chip! Then roll them in a clean kitchen towel to dry them well.

4. Fry
Fill the pot with 2-3″ oil and heat it to 350° F. I used olive oil because it’s what I always have on hand, but any light-tasting cooking oil should be fine. When the oil comes to temperature, I always test one chip just to make sure. It should sizzle nicely, but not too aggressively.
Fry them in small batches. You don’t want it too full because you want to make sure you leave enough space to flip the chips. They will stick together if you pack them in too densely. Stir them frequently so they cook evenly on both sides.
Remove the chips from the oil when they’re light golden brown. They go from light golden brown to dark brown and burned pretty quickly, so keep an eye on them as they near the end! They also will brown a little more when you take them out of the oil.

5. Salt
Set the finished kettle chips aside on a paper towel and immediately sprinkle them with your favorite salt. You want to salt them while they’re still damp with oil because it’ll help the salt stick to them.
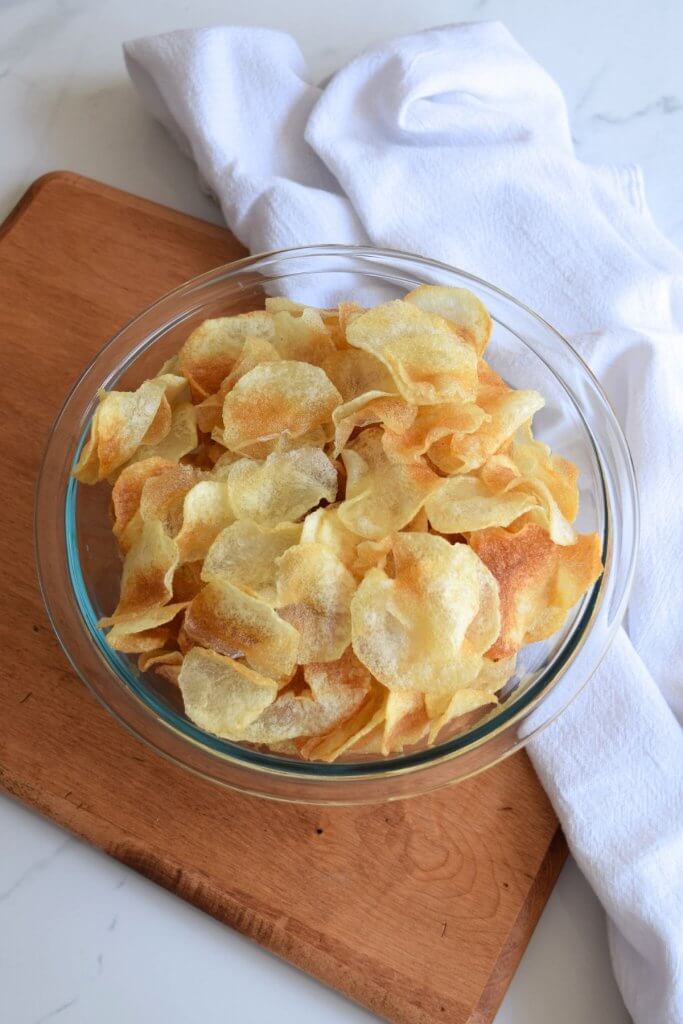
These kettle chips are addictive! You’ll want to make them for parties, family gatherings, and movie nights. There’s nothing like them when they’re fresh.
Seasoning options for homemade kettle chips
I prefer the simplicity of plain salt for seasoning, but you can use a variety of seasoning blends to suit your taste. A quick search online will pull up a ton of chip seasoning blends, or, if you prefer, you can make your own with seasonings you already have!
What flavor would you try?
Homemade Kettle Chips

Ingredients
- 2lbs Russet Potatoes
- Cooking Oil
- Salt
Instructions
- Peel the potatoes. This step is optional if you don't mind keeping the skin on your chips.
- Slice the potatoes into uniform slices, as thin as possible, using a mandoline or knife.
- Soak the slices in a bowl of cold water for about 30 minutes to remove starch.
- Roll the chips, a few at a time, in a clean kitchen towel and dry well.
- Fill your pot with 2-3" of cooking oil and heat to 350° F. When the oil comes to temperature, test one chip to make sure it's not too hot or cool. It should sizzle nicely, but not too aggressively.
- Fry the chips in small batches. There should be enough room in the pot for you to easily stir and flip the chips. If they're too crowded, they will stick together and not cook evenly.
- Remove the chips when they turn a light golden brown. Place them on a paper towel to absorb some of the excess oil. They will quickly go from the perfect golden color to burnt, so pay close attention to them near the end. They will also continue to brown a little once they've been removed from the oil.
- Salt immediately while still damp oil. The oil will allow the salt to stick to the chips.
Notes
Get creative with seasonings! I prefer plain salt on my homemade kettle chips, but there are so many delicious seasoning blends. Whip up your own or search online for a wide variety of mouthwatering options!
Shop this post
- potato peeler
- mandoline
- cut-resistant kitchen gloves
- cast iron pot (I use the larger one in this set)
Pin it for later!

Can’t wait to try this, looks yum!
You’ll love them! The crunch is so good!