
Learn to make 2 half square triangles at once! These are seriously the easiest quilt blocks to make and are super versatile! Make them in any size you need with almost no waste!
This post contains affiliate links, which means I make a small commission at no extra cost to you. See my full disclosure here.
The first time I made a quilt that called for a lot of half square triangles I was still very new to quilting so just I followed the directions of the pattern I was using. It instructed me to start with two fabric squares, sewing a diagonal line from one corner to the opposite corner, cutting off the excess pieces of fabric, and discarding them. While this method does work, it creates so much waste! Almost half of each square of fabric I used was cast aside. I was left with a big pile of trimmings that broke my fabric-loving heart.
This sad experience gave me a good reason to search for a better way of doing things. Luckily, I’ve since learned three different ways to make half square triangle blocks that create almost no waste! Depending on how many you need of a certain fabric combination, you can choose to make:
- 2 at a time
- 4 at a time
- 8 at a time (Magic 8)
Today we’ll talk about the first method (which I think is the absolute easiest), 2 at a time. This method will give you two HST units at once. It’s twice as fast as the old method!
What is a half square triangle?
A half square triangle (HST) is a quilt block made up of two right triangles joined on the diagonal line to make a square. It is one of the most common blocks in the quilting world because of its versatility! There are endless options for quilt patterns using this simple block.

How to make 2 half square triangles at a time
Start with two squares of fabric of the same size. Use different colored fabrics for contrast. Then put one right on top of the other with right sides together.

To figure out what square size to start with, just add an inch to the finished size of the block you want to create. For example, if you want a 4″ finished block, you’ll start with two 5″ squares.
This won’t give you the exact size you need, it’ll be slightly bigger. I like to have little bit extra to trim off at the end because my seam allowances aren’t always perfect. This way I don’t end up with a block that’s too small at the end.
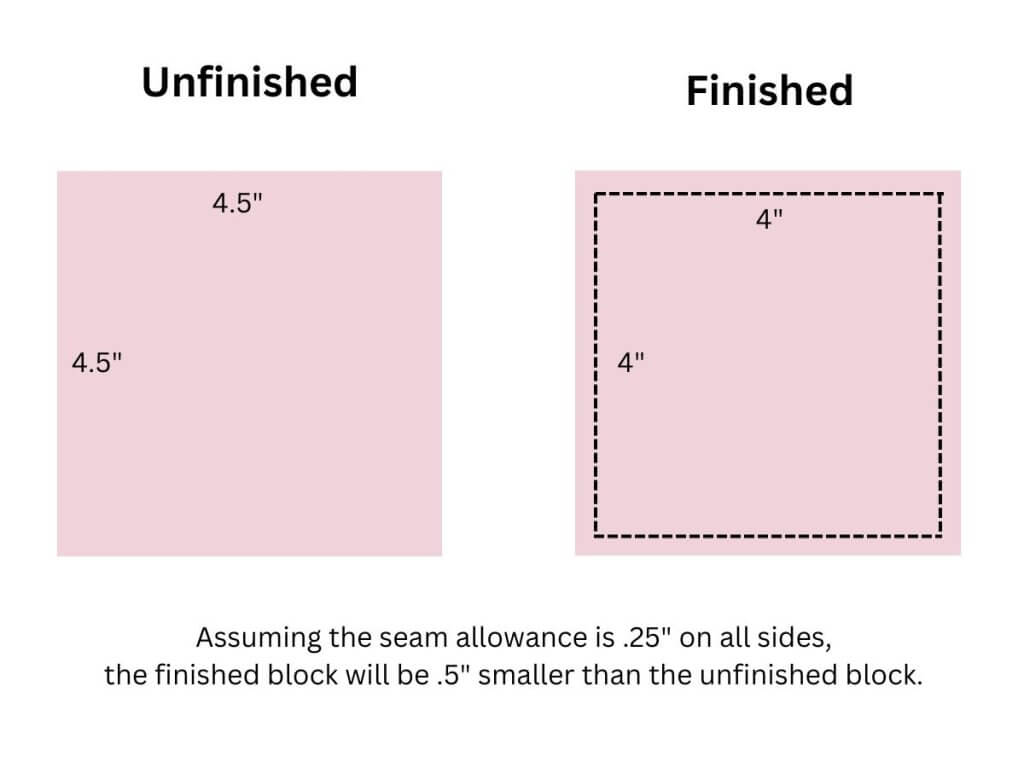
The finished size is the size of the block minus the seam allowance. This is what it will measure once it’s sewn into a quilt. The unfinished size is the size of the block including the seam allowance. This is what it will measure by itself before it’s sewn to other blocks.
Draw a line from one corner to the opposite corner on the wrong side of the fabric. Use your sewing machine to sew on both sides of the line using a quarter inch seam allowance. If you’re making a few of these I recommend marking all of the lines first, then try chain piecing the blocks together. Depending on how many blocks you make it can make the process go so much quicker!

Cut between the seams on the marked line.

Which way do you press seams on a half square triangle?
Open the blocks and press the seam allowance to the dark side. You’ll want press seam allowances toward the darker fabric to prevent the seams from showing through the lighter fabric when you assemble your quilt. This won’t apply in every situation, but it’s a good rule of thumb.

How to trim half square triangles
Lastly, trim off the excess to square up your block. There are a couple of ways to trim HSTs.
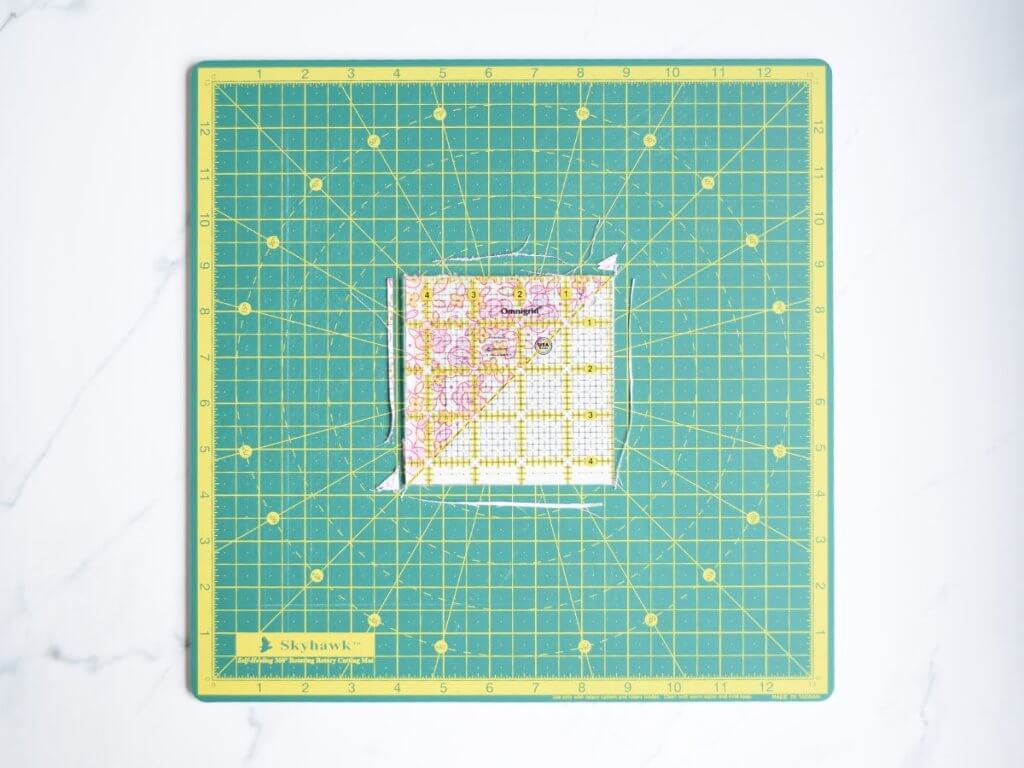
1. Square quilting ruler– If you have a square quilting ruler in the correct size (the correct size being your unfinished block size), then definitely use it! It’s the easy way to cut a perfectly square block.
If you have a rotating cutting mat, use that too! If not, you can totally use a regular one. I just find a rotating mat to be super convenient for this.
Place your block on your cutting mat, lining up the diagonal line of your square ruler with the diagonal line of your block. Use a rotary cutter to trim the dog ears and excess fabric all around the ruler.
2. Rectangular quilting ruler– Sometimes I don’t have the right size square ruler, so I just use my regular rectangular quilting ruler.
Place your block on your cutting mat, lining up the diagonal line of your rectangular ruler with the diagonal seam line of your block. Use a rotary cutter to trim the excess around the right side and top of the block.
Lining up the diagonal lines will keep your points sharp when you assemble your quilt. When it comes to quilt blocks, I love a sharp point. I don’t know about you, but I always take a second to smile at them when I get them just right.
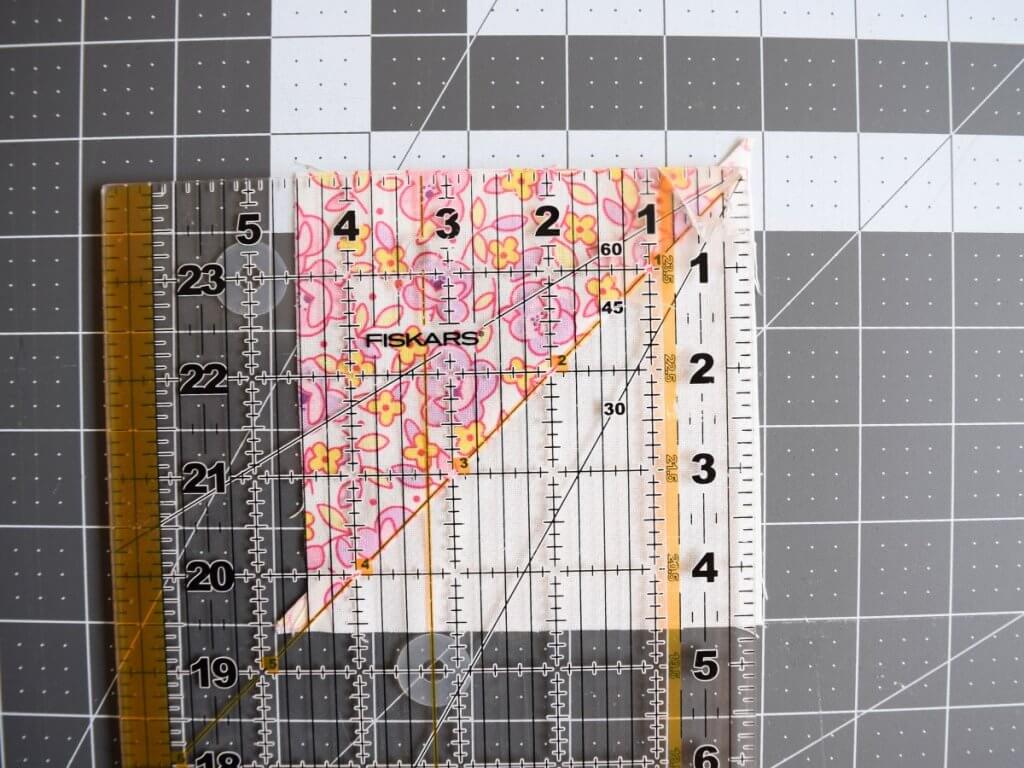
Rotate the block. Again, line up the diagonal line of your ruler with the diagonal line of your block. But this time, also line up the previously trimmed edges with the vertical and horizontal lines for the correct measurements on your ruler. See how my block is lined up with 4.5″ mark on the left side and bottom?
Trim the last two edges.

Now you have two beautiful HST blocks ready for your next quilt project.

There are a ton of half square triangle quilt patterns, so I guarantee you’ll be using this block over and over again.
When you’re done with your quilt, you can finish it off with a continuous bias binding!
Shop this post
- Square quilting rulers
- Rotating cutting mat
- Rotary cutter
- Cutting mat
- Sewing ruler
- Fabric marker
- Scissors
Pin it for later!

I’ve always love sewing and homemade items. This information is priceless, thanks for sharing!
I’m so glad you found it helpful!