
Making continuous bias quilt binding is easier than it looks! Learn how to make it and calculate how much fabric you’ll need. You’ll only need to sew two seams for whatever length you make!

This post contains affiliate links, which means I make a small commission at no extra cost to you. See my full disclosure here.
Usually, when I bind a quilt, I use straight grain binding. It’s the most straightforward kind to cut from yardage because you make your cuts straight across along with the weave of the fabric. It doesn’t get simpler than that. It’s also super easy to calculate the number of strips you need to cut from the width of the fabric, which is great if math is not your strength. (That’s me. Math is not my strength.) So, you’re probably wondering, “Why wouldn’t you just use straight grain binding all the time?” Great question.
Straight grain binding does have a couple of drawbacks.
For one thing, it only works well on straight edges. You’ll get a lumpy-looking finish if you try to use it on a curve. It’s not pretty. The tighter the curve the worse it looks.
The other thing to consider is that it creates less durable edges. Because the fold line is made right along the grain, it’s more prone to wear over time. If you’re using quality fabric, it’ll take a long time, but it is something to consider if you’re making a beautiful quilt that you poured your heart into, and hope will be cherished for years to come.
So, what’s the alternative? Bias binding tape!

What is bias binding?
Bias binding is cut at a 45-degree angle to the grain of the fabric. This gives it a nice stretch that allows it to ease around curved edges. It gives you a beautiful smooth finish. I also love using bias binding when I want diagonal, candy cane style stripes from a horizontally striped fabric.
Because it’s cut on an angle to the grain, you’ll also get a bias edge that is a little more durable. Unlike a straight grain binding, it’s not going to receive constant strain and wear on the one or two threads that are on the folded edge. The fold is spread out evenly amongst every thread in the binding strip.
As with the straight grain binding, there are again a couple of drawbacks to bias bindings. The first is that it’s not quite as straightforward to cut. There are a few ways to go about it, but the way we’ll talk about today involves cutting out a square shape rather than the simple strips of the straight grain tape.
Secondly, there’s the math. Ok, it’s not actually that bad. It’s only one extra step.
How do you calculate bias binding for a quilt?
First, find the length of the perimeter of your quilt and add a few more inches to give yourself room to join the ends of the binding. I like to add about 12″. Next, multiply that total length by the width of the binding strip you’d like. This will give you the total square inches you need.
- For example, if your quilt measures 50″ x 65″ and you want 2.5″ wide strips-
- Add. 50+50+65+65+12=242.
- Multiply to find the area. 242 x 2.5= 605
- You’ll need 605 square inches of fabric.
Then find the square root of the area. Round up to the nearest whole number. The answer you get will be the size of the square of fabric you’ll need to cut.
- The square root of 605 is about 24.6. So, we’ll round up to 25.
- You need a 25″ x 25″ square.
Now you know the amount of fabric you’ll need. It’s pretty simple once you wrap your mind around it. It just takes me a second to get there.
What is the easiest way to make bias binding?
Now that you have your calculations done, let’s make a bias binding the easy way!
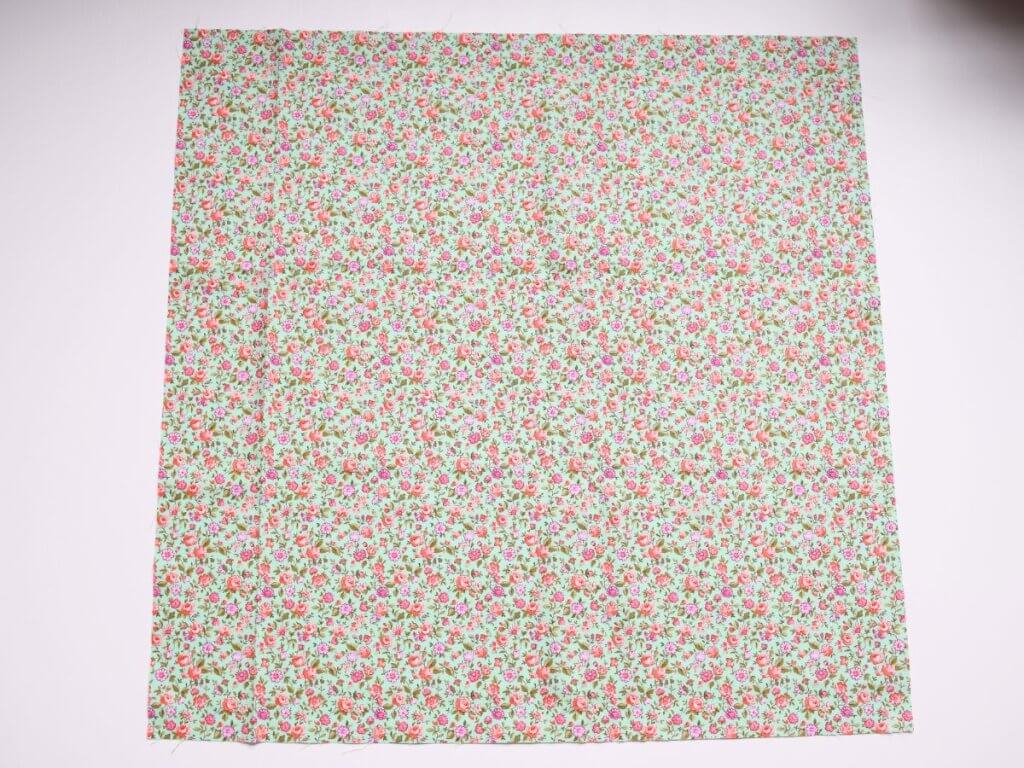
Cut out a square of your binding fabric to the correct size for the length you need.
Use the straight edge of a cutting ruler and rotary cutter to cut it in half at a 45-degree diagonal line starting at the upper left corner and ending at the lower right corner. You’ll have two pieces of fabric in the shape of right triangles.
Sometimes it can be helpful to fold it in half as shown below, to find where you should cut. Just make a crease and cut at that line.

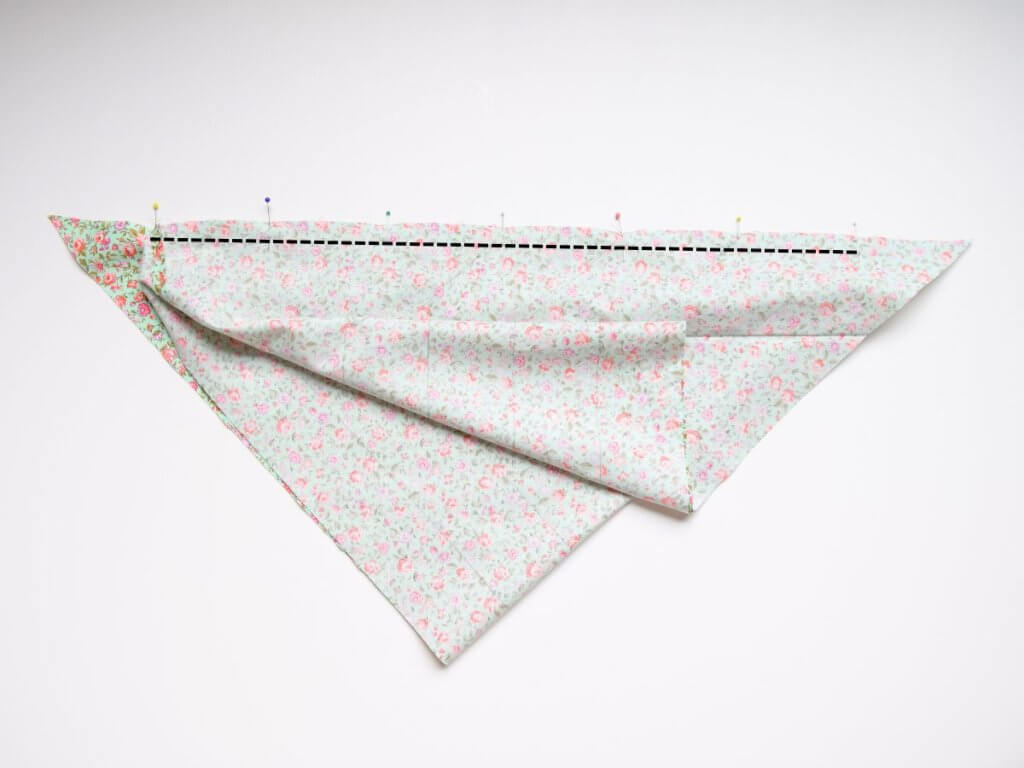
Flip the bottom piece of fabric over, matching the left side to the right side. Pin and use your sewing machine to sew down the edge with a 1/4 inch seam allowance.

Press the seam open with an iron. Note the shape of the fabric. It should look like a parallelogram.
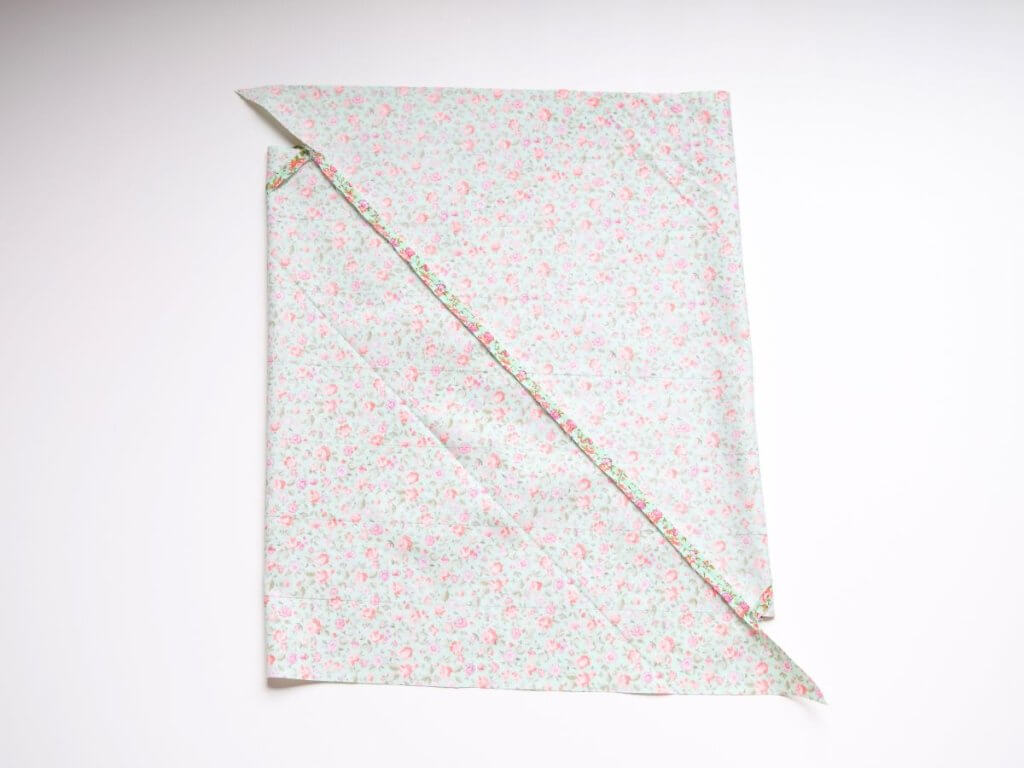
Use a fabric marker to draw parallel lines marking your desired binding width. Mine are 2.5 inches apart.

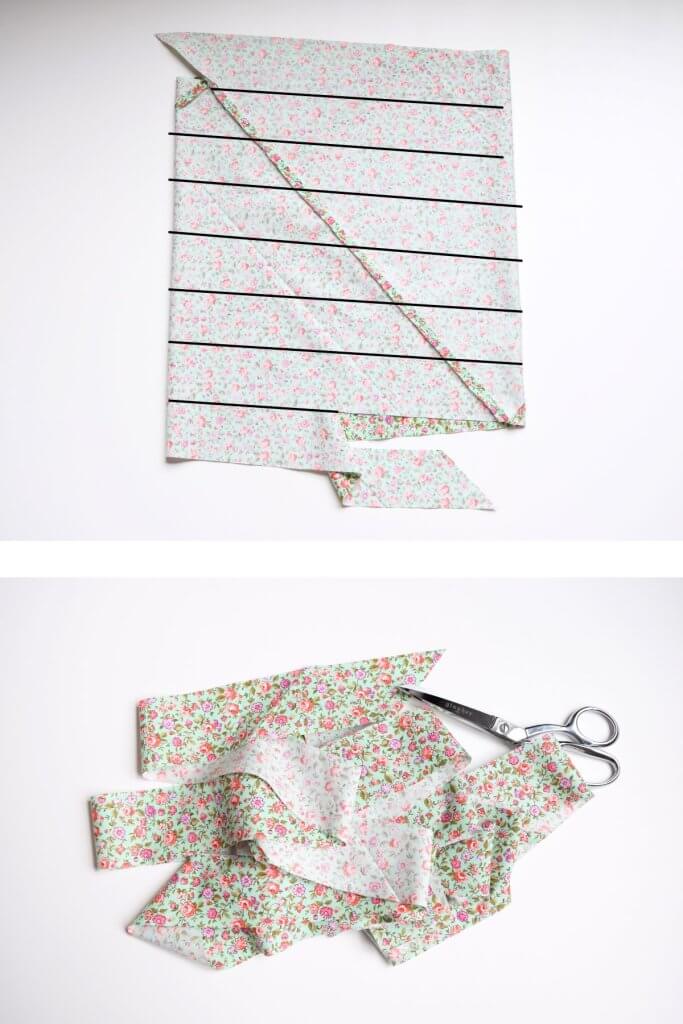
With right sides together, put the edges together with the strips offset. The first and last strips will not have corresponding strips to match to.
The lines you’ve drawn should not quite meet. They should be slightly offset 1/4 inch so that when you sew them together the seam will go right through where they intersect.
Pin the two sides together. At this stage, it will look like a wonky tube with the wrong side of the fabric facing out. It’ll look better in the next step!
Sew down the pinned edge with a 1/4 inch seam allowance. Press it open.
Use your scissors to cut along the drawn lines to create a long continuous strip.
Now for the last step. Press it into either single fold or double fold bias tape. And that’s it!

This method is so easy compared to cutting out strip after strip of fabric cut at a 45-degree angle. I used to do it like that all the time! I always hated sewing all of those little strips together. Now that I’ve found a better way, I can make yards of continuous bias quilt binding in no time at all. The best part is I can make whatever length I need, and I only ever have to sew 2 seams!
Give it a try when you’re ready to bind your next quilt!
Helpful tools for this project
Pin it for later!

Homemade quilts are just stunning, nothing can compare! Thanks for the great tips!
I agree! You’re welcome!
Beautiful! And very helpful pictures and descriptions. Thank you for sharing!
Thanks, Mariah! I love using this method for making binding. It really is so easy!
I love homemade quilts. Makes me wish I paid attention o my grandmother when she was trying to teach me how to sew & knit. Great post!
Thank you! It’s never too late to learn. I learned the bulk of what I know as an adult!